Sample Epoxy Mounting
Jump to navigation
Jump to search
Loss Prevention
- Safety glasses should always be worn in the metallography labs
- Gloves should always be worn when working with chemicals
Procedure
- Use an abrasive saw with a water-soluble oil as a lubricant to cut the sample to be mounted.
- Clean the sample using ethanol and dry with compressed air
- Grab the mold and place the sample into the mold. Make sure to place the surface to be examined face down.
- Grab the epoxy resin and corresponding hardener. Read the directions on the resin container for the proper mixture of resin-hardener. (fig. 1)
- Place empty cup onto scale and tare
- Weigh out the required amount of resin and tare the scale
- Weigh out the hardener. If needed add a dab of color to the cup.
- Mix the resin and hardener for 5 minutes
- Pour the epoxy into the mold
- Allow molds to site for the amount of time specified on the resin container
- Remove the bottom cap of mold
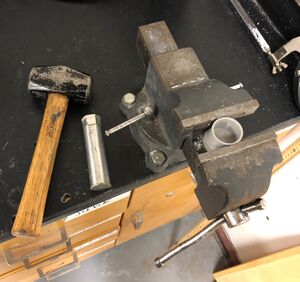
- Place mold in the bench vise and tighten it down (fig. 2)
- Use the metal rod and hammer to knock the sample out of the mold.

