Induction Hot Compression Testing
Jump to navigation
Jump to search
Safety Precautions/Loss Prevention
- Operator must be wearing safety glasses in the mechanical testing lab.
- Do not wear loose jewelry around induction power source or coils.
- Do not operate the induction power system or mechanical testing frame without training.
- Heat resistant gloves must be worn when handling heated samples.
Standard Operating Procedure
Compression Sample Preparation
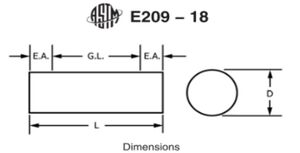
- Machine compression samples that follow an ASTM standard.
- Surface smoothness is crucial for successful testing as friction should be minimized.
- All samples must be spray painted black for the IR temperature sensor to be able to detect them/
Cooling System Set-Up
- Ensure that the radiator has a sufficient supply of distilled water, there is a bucket on top of the radiator to refill it if needed.
- Ensure that the Supply and Return hoses are installed properly on the Induction Power Source and radiator.
- Ensure that the valve on the back of the radiator is opened. Turn on the radiation pump by pushing the green button located under the protective plastic film.
- Open the Hot and Cold water supply valves located downstream of the radiator.
- Check to make sure there are no leaks.
Mechanical Test Frame Set-Up
- Position the Induction Power Source such that the induction coil is between the Test Frame platens.
- Ensure that the Induction Power Source switch is in the off position.
- Put on some heat resistant gloves.
- Gently pull the Induction coil down to provide enough room to install the compression sample onto the platens using long tweezers.
- Ensure the Induction coil is not contacting any surfaces.
- Position the IR Temperature Sensor so that the laser is directed onto the compression sample, make sure the laser is NOT directed onto the coil.
- Ensure the IR Temperature Sensor is turned on and confirm a good temperature reading.
Induction Power Source Set-Up
- Plug in the Induction Power Source to the required power supply located next to the Mechanical Test Frame.
- Flip the Power Switch to the on position on the back of the Power Source.
- Set the Set Point to 20%.
Running a Test
- Open the MTS TestSuite software.
- Start a new test or open an existing test.
- Click on the Monitor tab and set desired parameters for testing.
- Bring Crosshead down until almost touching the compression sample by clicking the down arrow on the software. SET ZERO BY RIGHT CLICKING ON THE CROSSHEAD DISPLACEMENT OUTPUT AND CLICKING “Set output to zero”.
- NOTE: If compression samples have significantly different lengths, Crosshead zeroing will have to be performed for each different sized sample.
- Once Zero is set, raise the Crosshead to an inch above Zero by clicking the up arrow, ensure that the platens are clear of the Induction Coil.
- Turn on the Induction Coil Power Source by pressing the Start Button.
- Observe the temperature reading until it is 25C above desired testing temperature.
- Bring the Crosshead to Zero by clicking the Enter button next to the arrows.
- Turn off Induction Power Source as the plattens enter the induction coil.
- Once the Crosshead reaches Zero, click the Play button.
- The software will prompt you twice, click continue & cancel on the respective dialogue boxes.
- Wait for the test to run and observe the temperature.
- Raise the Crosshead an inch above Zero after the test is complete.
- Flip the Induction Power Source switch to the OFF position.
- Gently push down the induction coil and remove the compression sample with the long tweezers, the sample will be HOT.
- Quench the sample in a bowl of water.
- Name your Test run as desired.
End of Testing Clean-Up
- Allow water to circulate for at least 5 minutes after your last test.
- Perform the above operations in the opposite order starting with Induction Power Source
