Milling Graphite Crucibles
Jump to navigation
Jump to search
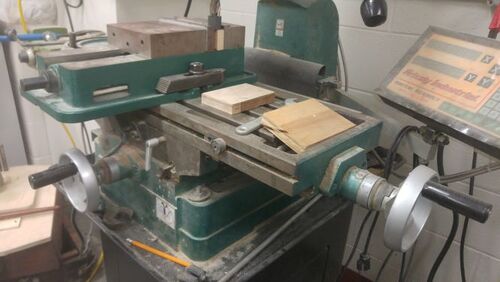
This page will document the procedure for milling graphite crucibles for use in Magnesium flammability testing or other testing where cheap, disposable, or custom sized crucibles are required. For the purposes of this SOP, assume 1" diameter round graphite bar crucibles that are 1" tall.
Loss Prevention
- Use of the mill in the pattern shop is restricted to those who have been trained and/or approved for use by Dale Dewald. All users must report to him before using this equipment
- A nuisance dust mask can be used, usually called a dust mask, but there are specific restrictions in place for use of these. If a dust mask is desired, contact Russ Stein to acquire one and receive proper instructions for EHSA compliance.
- Following this, there are no health hazards associated with milling graphite or graphite dust but many people experience a general discomfort with cleaning and removal of the dust from skin and clothing.
- Long hair must be tied and strings on clothing may not be worn during use of the mill.
- Safety glasses must be worn while in the pattern shop.
- Gloves may not be worn during use of the mill or other rotating tools.
- End mills are very sharp, handle them with care when changing tools.
Procedure
- Begin by cutting 1" long sections of 1" diameter graphite on the abrasive saw.
- If coolant is used be sure the samples are thoroughly dried before milling or use. Refer to the Abrasive cut off saw SOP for use on this. Shorter samples
- Shorter samples may be cut for smaller crucibles if desired.
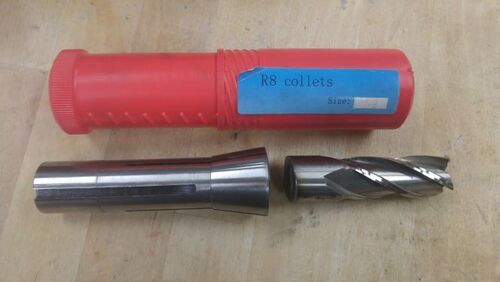
- If needed, change out the collet and end mill to fit the size of your crucible.
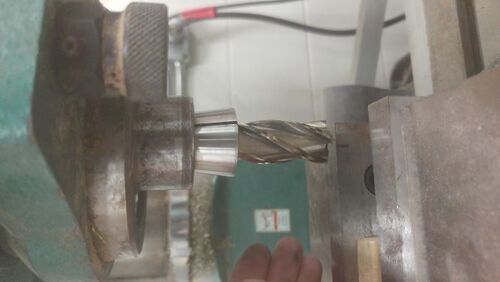
- Remove the cap from the top of the mill to expose the drawbar. Using a suitable pair of pliars and the pivoting socket wrench. Loosen the drawbar sufficiently until it can be unthreaded from the collet by hand.
- Be prepared to catch the collet and tool as they will fall out when the drawbar is removed. If they do not, a few light taps of the drawbar will release them.
- Insert your tool into the drawbar until the shoulder of the bit is covered. Replace the collet with the appropriate size and end mill. Insert them into the spindle and thread the drawbar into the collet.
- Tighten the drawbar with the pliars and wrench as before. Do not overtighten them. Milling graphite is a very lightweight procedure. Replace the cap covering the drawbar.
- Place your graphite into the vice on the table and align it with the right edge of the vice. Tighten it securely but be careful not to fracture the sample.
- Using table traverse wheels, align the end mill with the center of the graphite crucible. If the sample is not cut flat, a quick sanding or facing operation can be performed to fix this.
- Lowering the tool to touch the sample face can ease the process of centering the tool on the workpiece.
- Once centered on the part, lower the tool to touch the surface of the graphite and note the head position on the scale. Your final cut depth will be an offset from this position.
- Position a portable vacuum hose so it can be held near the workpiece to collect dust as it is created.
- Clear all materials of the tool. Turn the mill on by turning the power to "FWD".
- Tighten the coarse vertical feed knob to engage the fine vertical feed. Begin lowering the tool head to the bottom workpiece using the fine vertical feed knob to the workpiece.
- Enter the workpiece at a slow but constant rate until the desired depth has been reached. This should be noted on the scale as the distance traveled will be equal to the depth of the crucible
- A recommended floor thickness is 1/16" - 1/8". This is a total cutting distance of 7/8"
- Exit the workpiece by retracting the tool above the graphite crucible. Turn off the the tool by turning the power to "Off"
- A graphite crucible should be made. Repeat as necessary but alignment does not need to be repeated once done for the first time.
- Holes may be drilled into the side of the crucible following a similar procedure if you wish to put thermocouples through it.
Shutdown
- Remove the crucible from the crucible if no further samples will be made.
- Remove and replace the collet and end mill from the machine. Return the collet to its respective holder and put into the drawer.
- Clean the area by vacuuming all graphite dust and sweeping that which has accumulated on the floor.
If the Task has Subtasks, Use Subheadings
- There may be instances where several tasks, each having multiple steps, are required to complete an overall larger task.
- Break the larger task into subtasks and separate subtasks by placing them under a subheading.
- Heading hierarchy is based on the number of equal (=) signs at the start and end of a line. Click the Edit tab and view the contents of this page for an example.
Formatting Text and Images
- See mediawiki formatting help for detailed formatting information.
- See mediawiki images help for detailed image formatting information.


