Nanoindentation sample preparation for Al
Jump to navigation
Jump to search
The following is an SOP for the preparation of cast aluminum alloys samples for nanoindentation testing.
Loss Prevention
- Safety glasses are required to work in polishing labs at Michigan Technological University.
- Be mindful of the polishing machines. There are pinch points when moving the head and the grinding pads could cause abrasions.
- The air hose in the polishing lab is strictly for drying samples.
- EDM produces Ozone- keep machine closed during operation
Procedure
- Mark part with a marker where future cuts will be made
- Cut samples from part using edm (electrical discharge machining) to minimize subsurface deformations
- Cutting settings
- Current 3A
- Voltage 4kV biased voltage
- Feed rate .4mm per minute (speed through material)
- Enter code (Gcode) to determine cut
- Cutting settings
- Mount the samples
- Grind the testing surface manually using 600-grit SiC paper (Hudson)
- When the marking is gone, the epoxy layer should be removed (Roughly 5 minutes)
- Lubricate disk with water
- Grind the testing surface using 800-grit SiC paper (Hudson)
- Polish for 2 minutes with a pressure of 20N or 5lb
- Lubricate disk with water
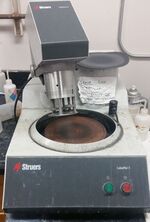
- Grind the surface using 1200-grit SiC paper (Hudson) using an auto-polisher(shown in figure 1) for 3 minutes with 20N load
- Fully load the auto polisher (3 samples) to maintain an even force on the samples
- Lubricate disk with water
- Polish samples with 3μm diamond paste polish for 10 minutes with a 20N load on a disc reserved for this purpose.
- Use Red lube to lubricate the disk. Do not use water.
- To apply diamond paste, Rub the paste into the disk with a gloved fingertip while the wheel spins around 100-200RPM.
- Polish samples with 1μm diamond paste polish for 10 minutes with a 20N load on a different disc reserved for this purpose.
- Use Red lube to lubricate the disk. Do not use water.
- To apply diamond paste, Rub the paste into the disk with a gloved fingertip while the wheel spins around 100-200RPM.
- Polish samples with .05μm Aluminum oxide polish for 5 minutes with a 40N load on a disc reserved for this purpose.
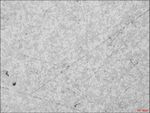
- Inspect surface under an optical microscope to ensure that the surface is well polished.
- For nanoindenation, the testing area should be smooth under 100X magnification
- If surface is too damaged, It needs to be resurfaced starting with the 600 grit paper

